Lil Celebrations

because even life's lil moments should be celebrated...

  • Home
  • About
  • Recipes
    • Appetizers
    • Breakfast
    • Dessert
      • Brownies & Bars
      • Cake & Cupcakes
      • Cookies
      • Frozen treats
      • Marshmallow Treats
      • Pies & Crisps
    • Drinks
      • Alcoholic
      • Non-alcoholic
    • Entrees
    • Holiday
      • Christmas
      • Cinco De Mayo
      • Easter
      • July 4th
      • Halloween
      • Superbowl
      • Thanksgiving
      • Valentines Day
    • Salads
    • Side Dishes
    • Soup & Chili
  • Celebrations
    • Birthdays
    • Life
  • DIY
    • crafts
    • crafts with kids
  • Contact

Mini Pumpkin Wreath

September 21, 2016 Leave a Comment

I love decorating my home and in particular crafting items for each season.  And this wreath is one of the most favorite things I have made for my home.  While I actually made this last year, I have gotten so many compliments on it that I figured I would share it with you.

img_9178

It is pretty simple to make …all you need are mini putka pods (I bought 3 bags to have my pick of putka pods, but only 2 are really necessary), a foam wreath form (I used a 10 inch one, which they don’t have on Amazon currently but you always use a different size or look for a 10 inch one at your local craft store…similar one here) and a hot glue gun/hot glue!
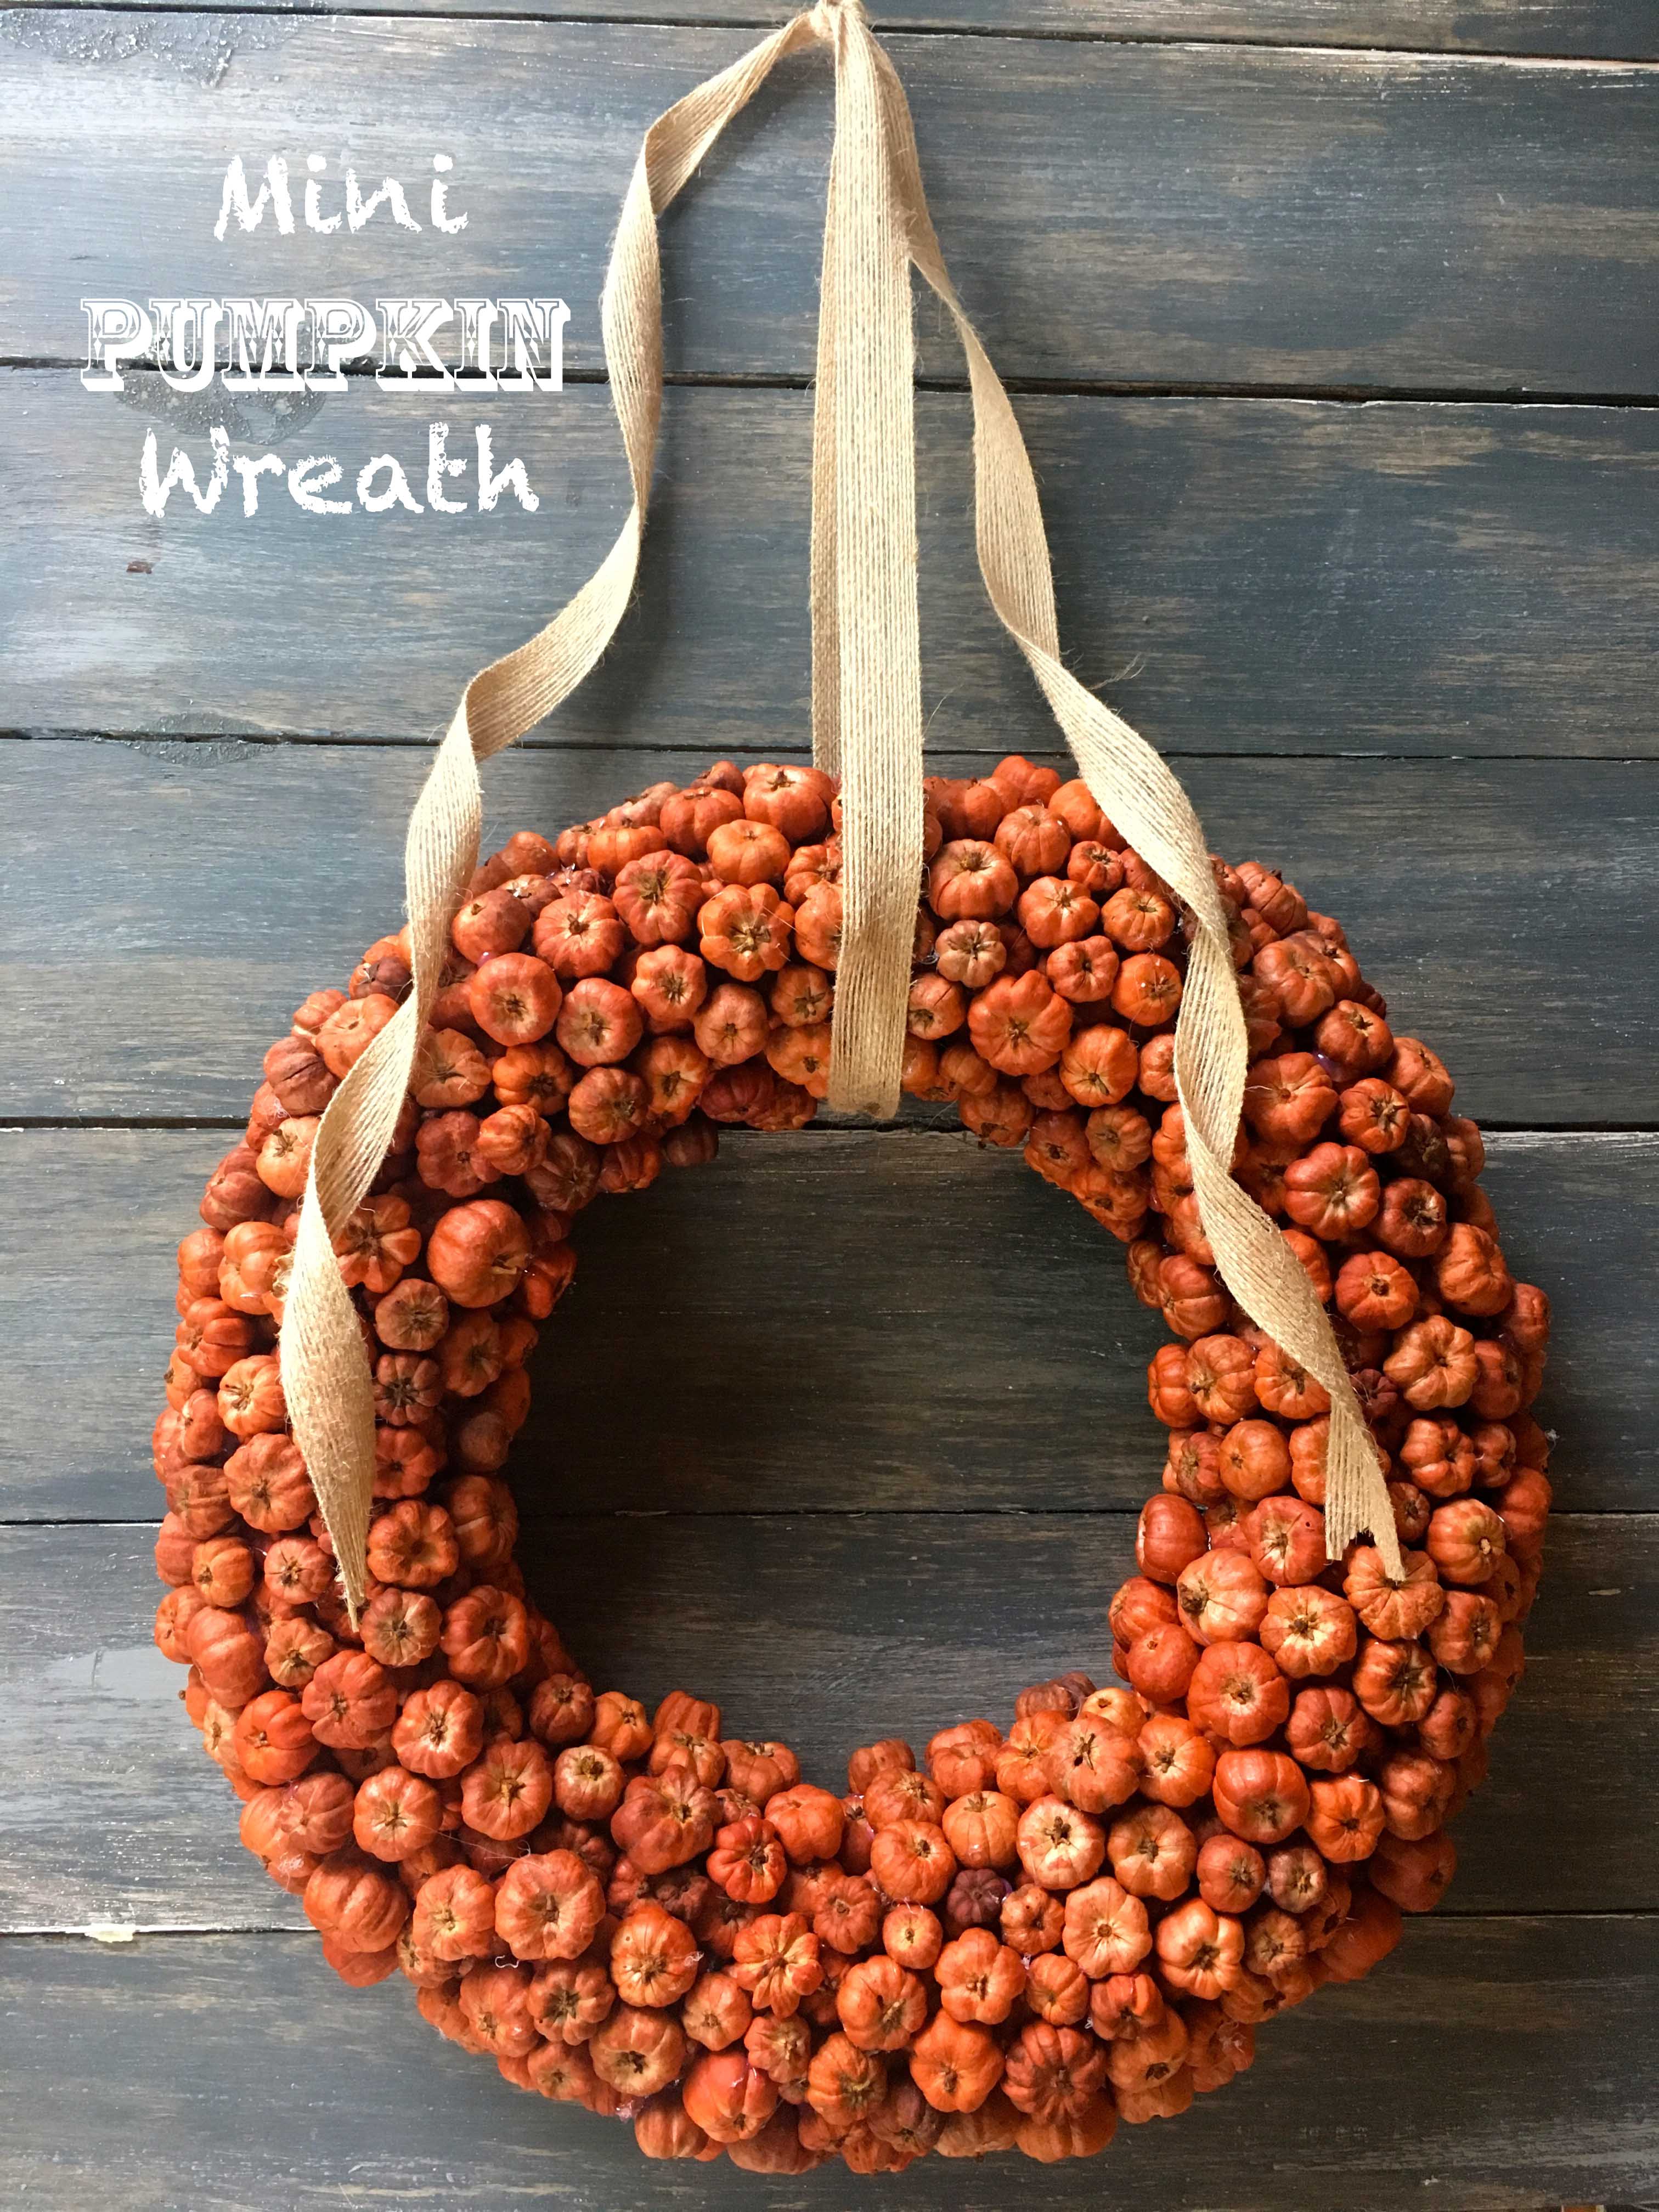
Mini Pumpkin Wreath

Materials Needed:

10 or 12 inch foam wreath form (I used a 10 inch one)

Approximately 8 cups of dried putka pods

a hot glue gun and glue sticks

ribbon and scissors 

Directions:

  1. Preheat hot glue gun. 
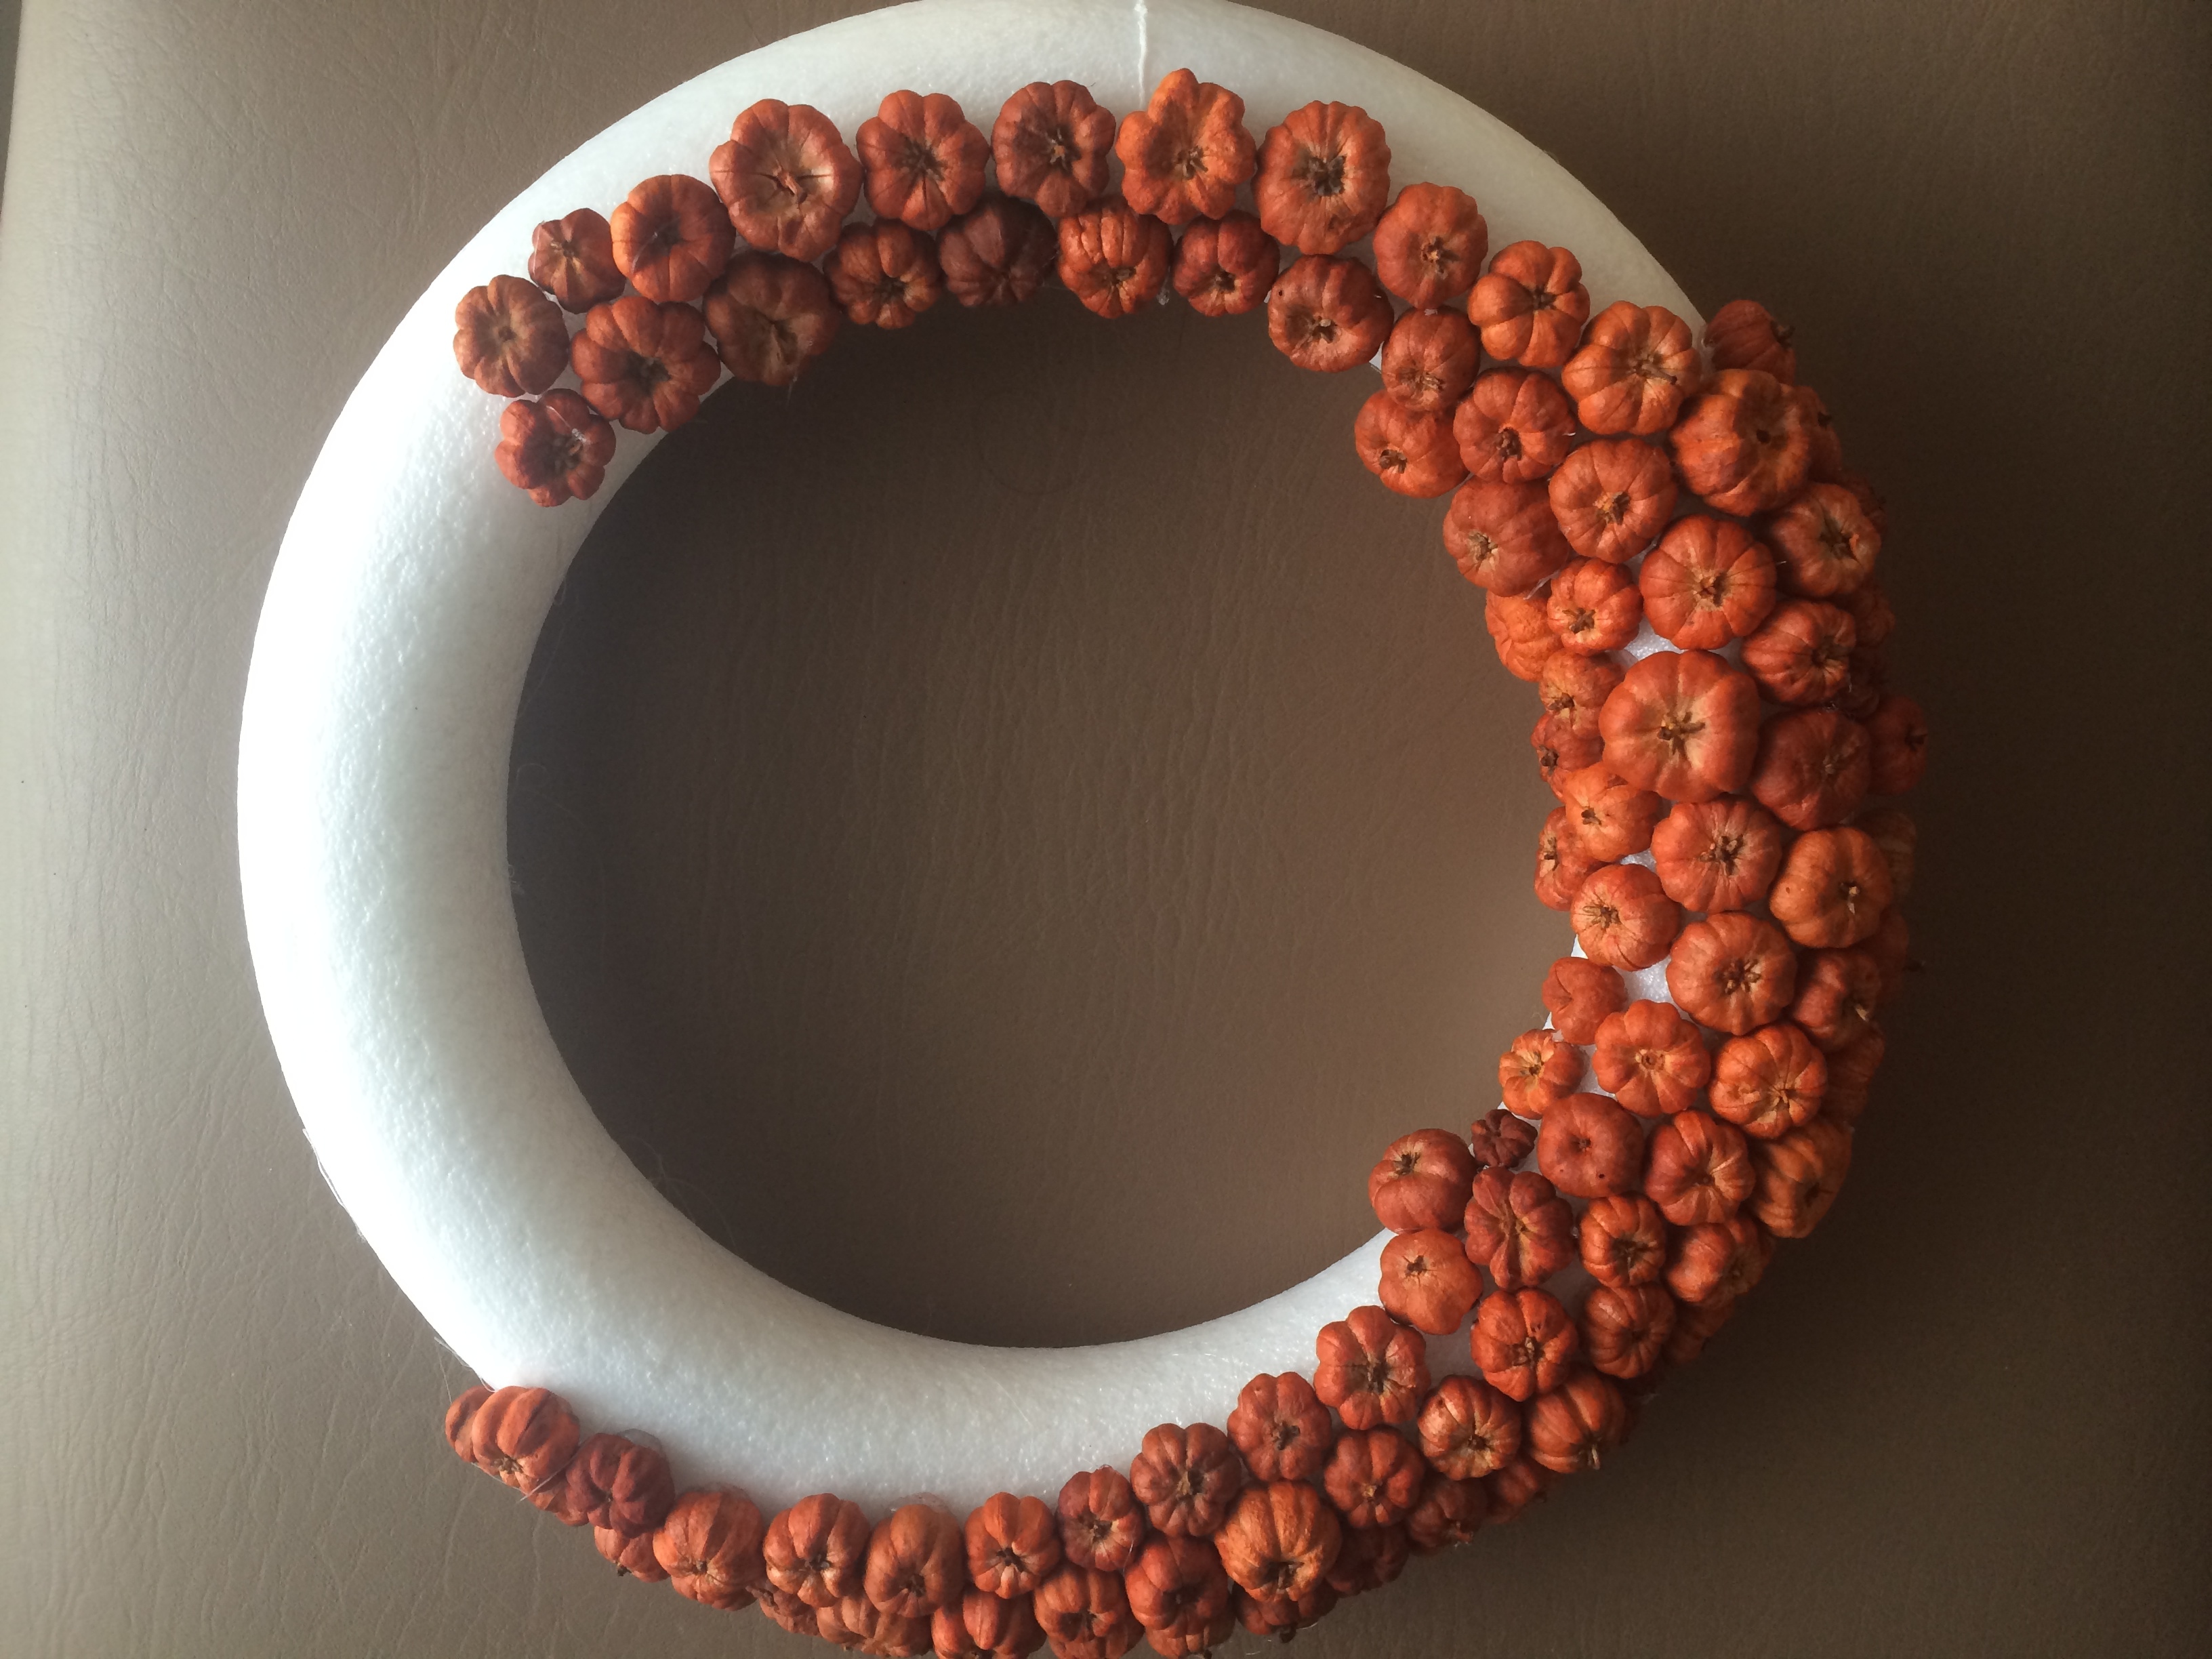
  2. Adhere putka pods to form with hot glue.  Press in gently.  Then add another putka pod right next to it with hot glue and repeat like so…img_2676
  3. Once you have covered the wreath form with one layer of putka pods start adding putka pods with hot glue over the existing white spots to create a second layer.  Let dry.  
  4. Once dry, cut ribbon and hang up your wreath!  

Note: You do not necessarily need to put putka seeds on the back of your wreath unless people will see the back (i.e. if you hang it on a mirror).  This wreath is best kept indoors, however if you do want to put it outside I would make sure it is in a covered awning.


Happy crafting and happy almost Fall!  

xo Lauren


P.S. This wreath was inspired by BHG (one of my favorite magazines EVER).  However I can no longer find the link online.


Filed Under: crafts, DIY Tagged With: DIY fall wreath, fall wreath, mini pumpkin wreath, pumpkin wreath

share: facebook | twitter | pinterest
« Blackberry and Elderflower Rose Cocktail
Leaf Sun Catchers »

Leave a Reply Cancel reply

Your email address will not be published. Required fields are marked *

Please fill out the form below: Time limit is exhausted. Please reload the CAPTCHA.

My name is Lauren and welcome to my blog!!  I am so happy you are here!  This is where I share all of the recipes from my family's celebrations both big and small.  Read More...

  • 
  • 
  • 
  • 

Subscribe via Email

Archives

Most Popular Posts!

  • Panzanella Salad with Heirloom Tomatoes!! 17 Jun , 2014
  • Cookies n’ Cream Snow Ice Cream 28 Jan , 2016
  • Pizza Meatball Burgers 06 Mar , 2014
  • Salted Mint Chocolate Cookies!! 22 Sep , 2014
  • Bacon Ranch Cheeseball 07 Jan , 2015

Site Design by Designer Blogs